
A Mini Note Album to jot down a few lines...some quotes...some pics...anything you have in mind!

6 pieces of square coloured paper (you could use the size as per your choice)maybe 4" by 4"
6 pieces of white paper(this is just for the centre so we can use 1/4th the size of the coloured paper)
Glittery foam sheets,
Ribbons,
Punchers(to cut out the hearts),
Sentiments
Permanent glue as well as ordinary glue.

Folding the papers is a little tricky :)
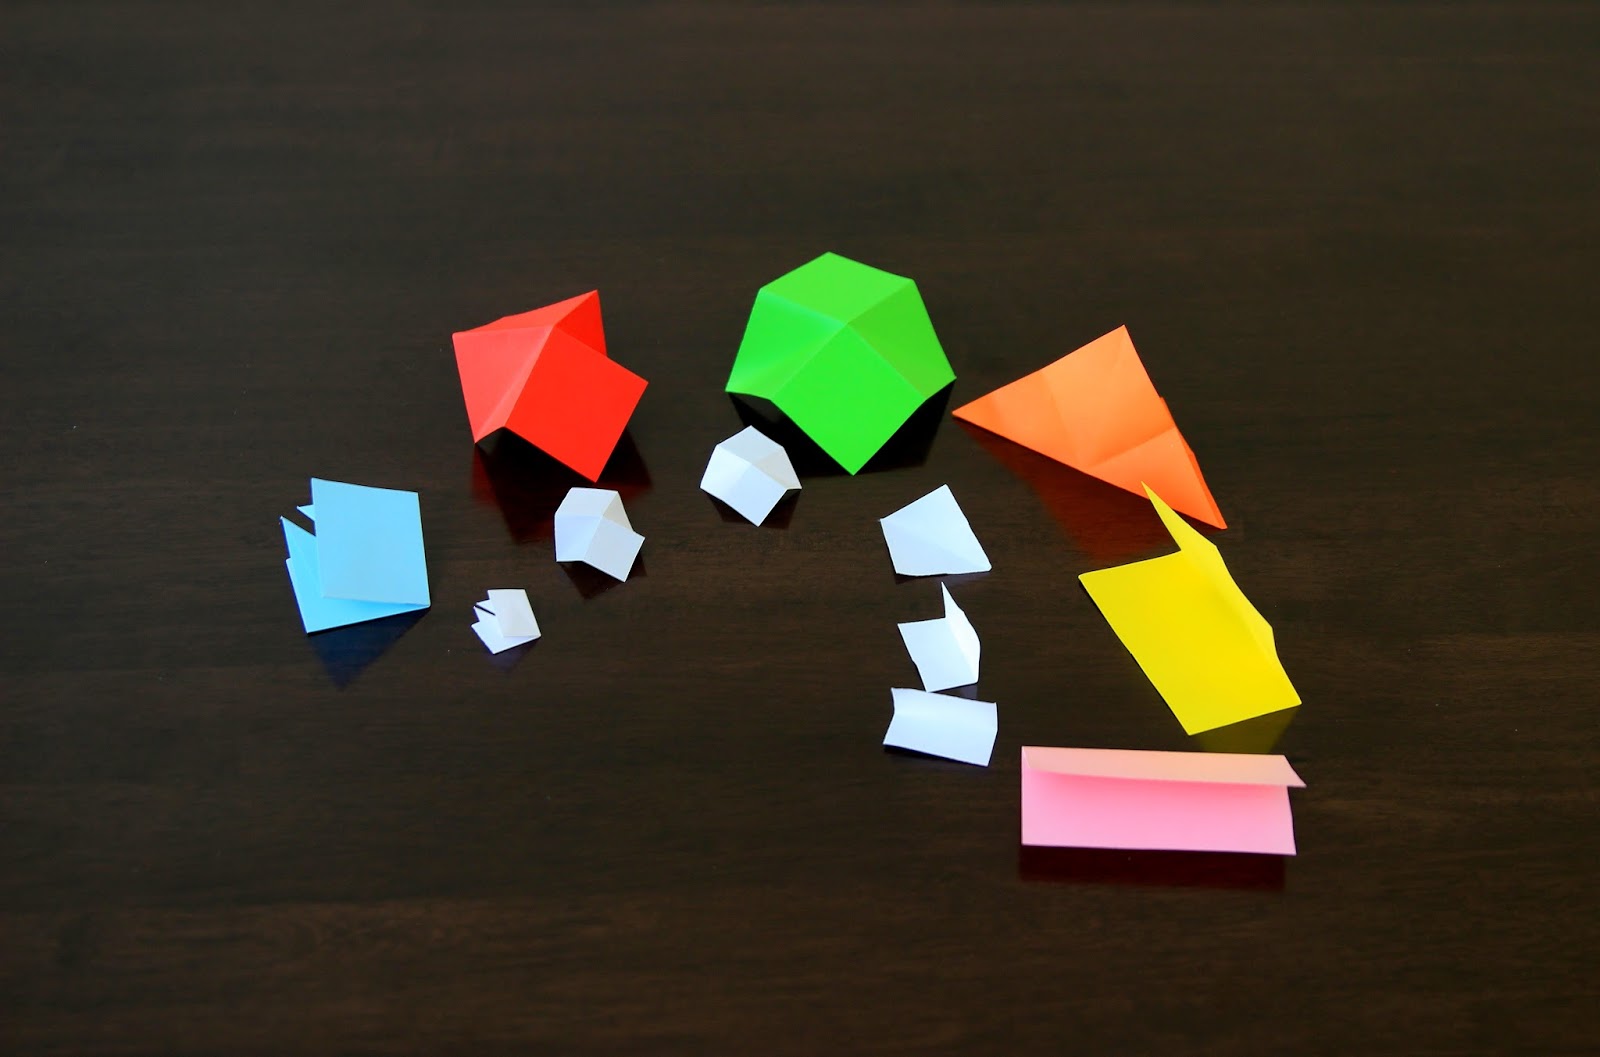
Hopefully I will be able to explain it.... I have placed the papers in sequence.(You can always leave a word and I can get back to you. Actually was feeling lazy to take more pictures :))
Fold the paper vertically into half (as in the pink paper).
Open it and fold it again horizontally into half (the yellow paper).
Turn over the folded paper and fold it diagonally (this fold will be in the opposite side of the previous folds as in the orange paper).
Open it and pressing the diagonal fold inwards fold the paper(in the red paper).
Finally apply pressure on all sides and you are ready with your first piece.
Similarly fold all the pieces along with the white ones.
Once done all the white papers are stuck with glue to the centre of the coloured papers after being aligned to the similar folds. They are folded back individually.

After this is complete you can either leave it like that or cut it out in any shape you want..I thought I could use a leaf shape(as in the pink one).Arranged them all one on top of the other and glued them along the while paper.
Next I used the thicker paper(the brown on)to stick as the front and back of the cover. Passed a ribbon through(front to back and left it long enough to be able to tie a bow).
To cover this I used the foam glitter adhesive paper to keep the ribbon intact :)
Punched out two hearts for decoration and added a sentiment "memories" to the cover and the Mini note album is ready!!

When you open it and tie up both ends it will look like this...a beautiful flower!

You can write a note in one of those(my so called) leaves...stick a pic or write a few loving lines for a loved one. It's my elder ones birthday today and plan to give this to her so wrote a Happy Birthday for her. You can also use this as a simple ornament and hang it up...so many choices right??
 |
Hope you enjoyed your time here.
|
Linking up for more creative blogs at :
Inspire Me Monday
Amaze Me Monday
Monday Madness
Mix it up Monday
Inspiration Monday
Hand Made Tuesday
The Gathering Spot
Create Link Inspire
Tuesday Afternoon
Show off what you have Created
Creative Ways
Create it Thursday
Artsy Corner Thursday
Little things ThursdayInspiration Monday
Hand Made Tuesday
The Gathering Spot
Create Link Inspire
Tuesday Afternoon
Show off what you have Created
Creative Ways
Create it Thursday
Artsy Corner Thursday
Friday Photo Journal
How cool is this!
ReplyDeleteVery clever and colorful - I love this idea!
ReplyDeletePlease come share at http://image-in-ing.blogspot.com/2016/02/abstractions.html
Oh, this looks like such a fun craft. I love all the colour!
ReplyDeleteSharing snapshots at Captured By Jade
I love this idea! How creative. Thanks for sharing.
ReplyDeleteSuch a cute idea!
ReplyDeleteVery cute and clever!
ReplyDeleteVery cute and clever!
ReplyDeleteFun creativity!
ReplyDeleteThat is very cool!
ReplyDeleteThank you for sharing at http://image-in-ing.blogspot.com/2016/02/potted.html
Hello, what a cute idea. Very creative, I like it. Have a happy day and week ahead!
ReplyDeleteSo creative! Looks wonderful on its own too.
ReplyDeleteThank you for the directions so we can give it a try, I love it!
ReplyDeleteLooks really neat! Thank you for linking in with "Through My Lens"!
ReplyDeleteMersad
Mersad Donko Photography
Well that is very cool, kind of like a pinwheel too.
ReplyDeleteWhat a cool idea! Thank you fo sharing it with us at Photo Friday!
ReplyDeleteExcellent Blog! I would like to thank for the efforts you have made in writing this post on the blogs related to folded note cards
ReplyDeleteYour articles are like a breath of fresh air in the online space. Thank you for bringing a unique voice and perspective to your readers.
ReplyDeleteCrema Marfil Marble in Fujairah